Canon Printer Setup, Driver Download, & Installation with ij.start.canon
Setup and Connect your Canon Printer, Download Drivers, Connection Guide for you Printer/Scanner.
Quick Setup guide for your Canon Printer with ij.start.canon
Setting up Canon Printer or Scanner with ij.start.canon or ij.start.cannon is a very easy process and here are quick steps to set up your product model.
- Remove the Protective Taping:
A new printer or scanner comes with protective taping, identify the places your printer is taped for shipping and remove the taping. - Connect the printer Scanner to Power Supply:
Now, you will need to connect the printer to the included power supply cable. The Port is on the back of the printer. - Visit ij.start.cannon or ij.start.canon:
Open your favorite browser e.g. Chrome, Safari, or Edge, and type in the URL https://ij.start.canon or canon.com/ijsetup. - Click Set Up button with Red Printer Icon:
Now click on the Set Up button with sub text “(Start Here)” and type in the printer/scanner model. - Follow on-screen instructions:
On-Screen Instructions will simply show you the steps that you need to follow to download any software’s or drivers.
Note that ij.start.canon website automatically detects your location, region and your Operating System.
Unboxing and Initial Setup Guide with ij.start.canon
Setting up your Canon TS Series, G Series, GM Series and other Canon Printers are easy, Follow the steps to setup the Canon Printers.
- Remove the Protective Taping
- A new printer or scanner comes with protective taping, identify the places your printer is taped for shipping and remove the taping.

- A new printer or scanner comes with protective taping, identify the places your printer is taped for shipping and remove the taping.
- Connect the printer Scanner to Power Supply
- Now, you will need to connect the printer to the included power supply cable. The Port is on the back of the printer.

- Now, you will need to connect the printer to the included power supply cable. The Port is on the back of the printer.
- Install Cartridges
- Install Cartridges by lifting the top part of the Printer, the cartridge slider will center the cartridge slot and you can gently insert the cartridges and lock them in Place.
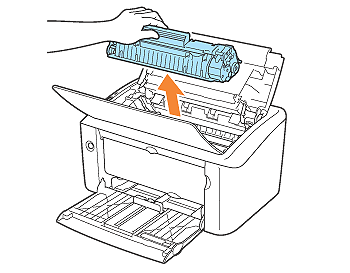
- Install Cartridges by lifting the top part of the Printer, the cartridge slider will center the cartridge slot and you can gently insert the cartridges and lock them in Place.
- Fill Up Ink Tanks
- (Optional) If you have an ink tank printer that comes with bottles of inks, You will need to fill the ink in the designated tanks up to the given maximum. Once filled you can tightly cap the bottles for reuse.
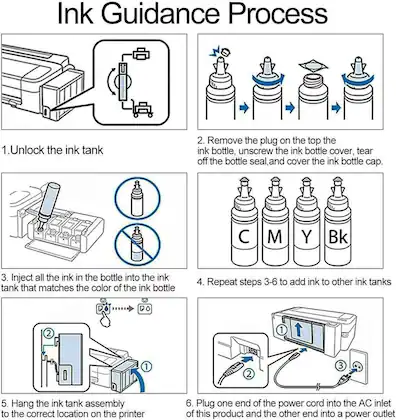
- (Optional) If you have an ink tank printer that comes with bottles of inks, You will need to fill the ink in the designated tanks up to the given maximum. Once filled you can tightly cap the bottles for reuse.
Note that ij.start.canon website automatically detects your location, region and your Operating System.
Wireless Printer Connection
Here is a guide for each Operating System for Wireless/Wifi Connection
Connect Wirelessly on Windows
Here is how you can connect your Printer to Windows wirelessly.
Before proceeding make sure that your Printer supports Wi-Fi/Bluetooth.
- Turn on your Printer, make sure that your Wi-Fi router is turned on and discoverable.
- On your Printer, If it has a screen navigate to Settings/Setup > Wireless LAN Setup. If there is no screen just hold the Wireless button.
- On the display select the Wireless setup or Wi-Fi Setup.
- Select your Network, It will be the name of your Wi-Fi connection that you connect to on your laptop.
- Once the connection is confirmed, the light on the printer will stop flashing and be static. Different printers have different colors for coding.
Auto-Detect Windows 11 (2026 Update)
- Go to “Settings” > “Printers” > “Add Printer”
- Click on the “Add Device” button
- Almost all the latest printer models from 2026 will automatically detect the printer and Windows downloads the drivers automatically.
This method is only compatible with a newer models and selected models. If the auto detect Windows driver does not work automatically, you will need to download the driver manually.
This method only downloads the basic IPP/class drivers for the printers and not the tools like Printer Utility and Scanning Software, for that you will need to download the tools and software’s manually from the Canon Site.
Connect with AirPrint Wirelessly on Mac
Setting up your wireless printer on your Mac is fairly simple and easy with the Print Center or Air Print. Here is how you can do that:
- Open System Settings.
- Scroll Down to printers and Scanners.
- Click Add Printer Scanner of Fax.
- Connect your Printer to the Wi-Fi by configuring Wi-Fi on your Printer Screen by navigating to Settings > Wireless Setup.
- Once the printer is on the same Wi-Fi network as of your Mac, you will see your Printer in the list.
- Select the printer and click Add.
Connect to your iOS Devices
Setting up your Printer on iOS takes only a few minutes and you can do it by simply following these steps:
- Turn on your Printer and navigate to Settings > Wireless Setup or Click the Wifi button (If the printer is without Display)
- Connect to the WIFI.
- Open App Store and Search for Canon Print and Install the app.
- Open the Installed app and search for your Printer that is on the same wifi network, both the devices should be on the same Wifi network.
- Connect your Printer to your app and start printing.
Connect to your Android Devices
Your Printer and your Android Device should be on the same WIFI network, Follow the instructions below to print or scan from your Android device.
- Turn on your Printer and navigate to “Settings > Wireless Setup” on the Printer Display.
If the printer does not have a display, Hit the Wifi Button to activate Wifi. - Connect to the WIFI.
- Open Play Store and Search for Canon Print and Install the app.
- Open the Installed app and search for your Printer that is on the same wifi network, both the devices should be on the same Wifi network.
- Connect your Printer to your app and start printing.
IJ Scan Utility
IJ Scan Utility, a tool developed by Canon INC for the Canon Scanners to make the process of scanning and editing documents easy. The software has multiple settings for scanning and editing the scanned document.

IJ Scan Utility which can be downloaded from ij.start.canon or canon.com/ijsetup and it includes features like:
- File Formats – PDF, JPG, PNG and more.
- Scan Gear
- Photo Scan
- Enhanced Document Scan
- Photo Editior
- Document Editor
- OCR
- Auto Scan
You can alternatively use the scanning apps that comes with Windows and Mac systems.
Note: The specific steps and options may vary depending on your Canon printer model and the version of Canon software you are using. For detailed instructions, refer to the user manual or online documentation provided by Canon for your specific printer model.
Steps to Align Canon Printers
Ensuring Precise Prints: Step-by-Step Alignment with Canon Software
- Ensure that your Canon printer is connected to your computer and powered on.
- Install the Canon software:
- If you haven’t already installed the Canon software on your computer, insert the setup CD provided with the printer into your CD drive, or download the latest software and drivers from the Canon support website. Follow the on-screen prompts to install the software.
- Open the Canon software:
- Launch the Canon software on your computer. The specific software name may vary depending on your printer model, but it is typically called “Canon Printer Assistant” or “Canon Printer Utility.”
- Access Printer Maintenance:
- Within the Canon software, look for an option or tab related to printer maintenance or settings. It may be labeled as “Maintenance,” “Settings,” or “Tools.”
- Locate Alignment Option:
- In the maintenance or settings section, find the option for printer alignment. It might be called “Alignment,” “Align Print Head,” or something similar.
- Follow on-screen instructions:
- Click on the alignment option, and the Canon software will guide you through the alignment process step-by-step. Typically, you’ll be asked to load a sheet of plain paper into the printer and initiate the alignment process.
- Print Alignment Page:
- The Canon software will print an alignment page with patterns or lines. Make sure the printed page is placed face-down on the scanner glass or in the automatic document feeder (ADF), depending on your printer model.
- Scan Alignment Page:
- Follow the on-screen instructions to scan the alignment page using your Canon printer’s scanner. The software will analyze the scanned page and make necessary adjustments to align the print head.
- Alignment Complete:
- Once the alignment process is finished, the Canon software will display a confirmation message indicating that the alignment was successful. You can then close the Canon software.
Cleaning and Maintenance

To improve the life of your printer you need to take care of the Print Heads and Nozzles of your Printer. For this you will need to clean nozzles, and printheads regularly. For this you can either use the inbuilt system configuration panel or the canon printer software to clean the print head, clean the nozzles, and align the printer. It helps with clear printing and no ink spillage. The tools can be found in Printer utility tools for Canon.
Factory Set Passwords
The default password (PWD) is a password that is set by the company by default the password is attached to the printer on the lid or the back side of the printer.
For some printers if the Password is not labelled or attached, the password set is either “canon” or the serial number that is printer on a slip on the back, under the lid or on the side of the printer.
If none of this works, you can simply go to System Information > Show Password. Also, if you have an option to Print LAN Settings or Print Network settings that also prints the password as well.
Canon Printer Maintenance Checklist
The default password (PWD) is a password that is set by the company by default the password is attached to the printer on the lid or the back side of the printer.
Here is how your printer can have a long life and have consistent quality in day-to-day printing.
- Make sure the Printer is always on a stable and flat surface.
- Always check for jammed paper in the printer, it can damage the printheads.
- Make sure the page is not too crushed for the printing.
- Keep the printer away from dusty and wet area.
- Run nozzle checks every week, Keeps the printer nozzles from clogging up.
- Use genuine Canon ink for best performance
- Update printer drivers from the official Canon website
Make sure you clean the printer everyday and wipe it off with a clean dry cloth to make sure the dust does not build up and fall into the printer and cause problem with the rollers, you can also clean rollers once a week to make sure the rollers run smoothly.
Canon Printer Driver Installation & Setup with ij.start.canon
This How-To guides you on Canon Printer Setup and Installation on your Windows, or MAC computers using wired or wireless connections. This guide highlights the important steps post unboxing of the printer.
Approximate Setup Duration: 15 minutes
Prepare your Printer/Scanner for Installation
Before proceeding with the driver installation, ensure that you have a USB cable for the connection available with you for wired connection, It is recommended to plug the cable in when the on-screen guide prompts so. Keep the Printer connected to the power supply. 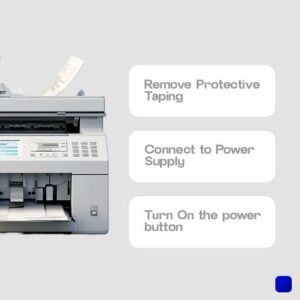
Open your Favorite Web Browser, Visit ij.start.canon or canon.com/ijsetup
Open a web browser on your computer. You have various variations of the Page that can be visited, some are ij.start.canon, ij.start.canon/connect, https://ij.start.canon or Search Canon Printer Drivers on Google. All will lead to same website. However the easiest way to do it is by visiting ij.start.canon directly from your Browser.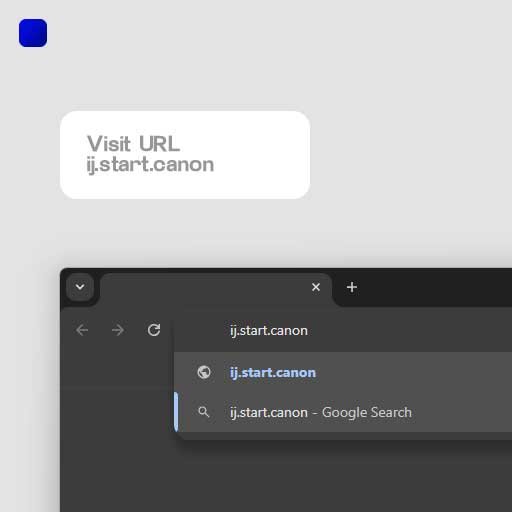
Click the “Set Up” button with Red Icon
Once you are on the official Canon Manual Website, Click on the Set Up Here button on the right of the main page frame with a red icon.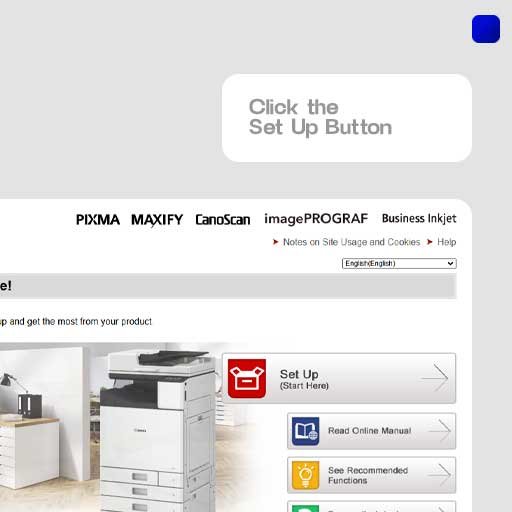
Type in your Printer Model Number
In the search field type in the Printer Model number that is written on the packing of the printer. You can also choose from the list below.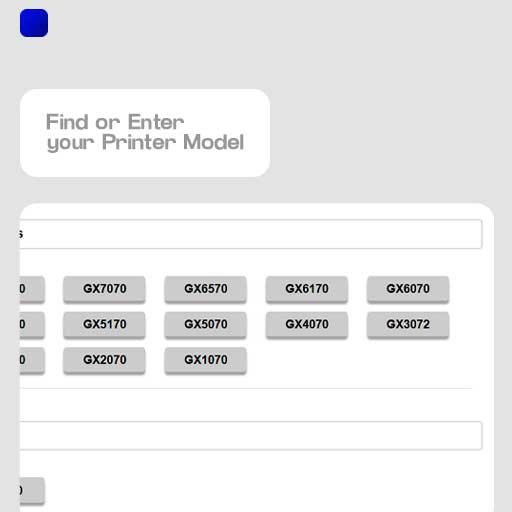
Your On-Screen Setup Guide will start
Based on your Operating system the ij.start.canon or canon.com/ijsetup website will automatically show you the next steps to unbox the printer and guide you to Printer Driver download Page.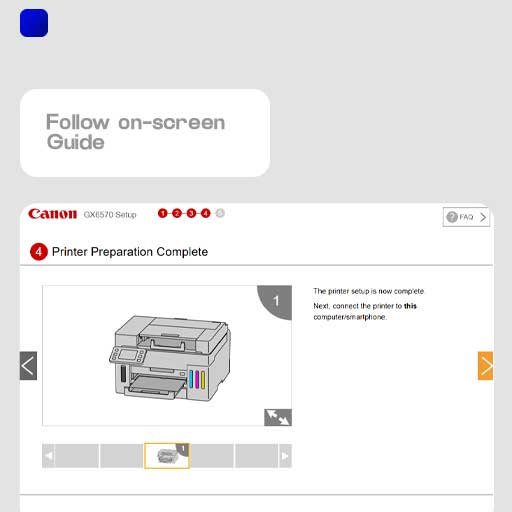
Download Driver or Software, If Prompted
Once the initial guide about unboxing ends, it will redirect to the Printer Driver Download page, you will see a Download Driver button, Hit the button to download the driver.
In some cases the driver is not need and the printer connects using Wi-Fi using your inbuilt wireless functionality, usually in MAC OS system.
Additionally, If using Windows, you can use the Auto-Detect feature in the windows Settings to download the recommended drivers online automatically. 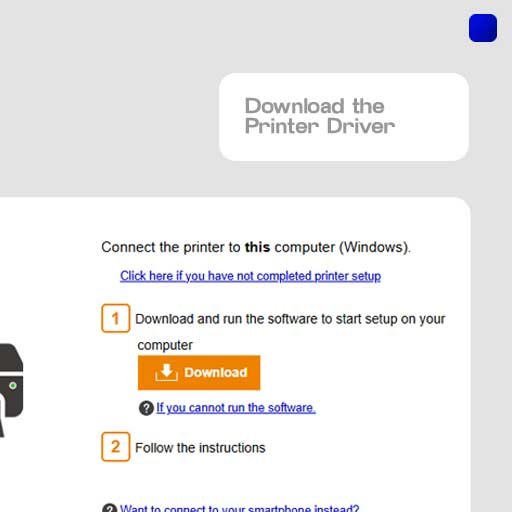
Run Driver Installation Process
If you were prompted to download the driver, Run the downloaded driver from your downloads folder. In windows, the file would be in “.msi” or “.exe” package. In Mac it will be in .pkg file. Run the file and install the software package with instructions on-screen.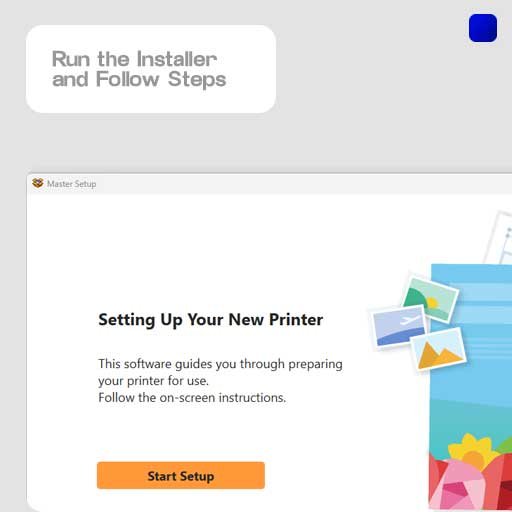
Start Wired or Wireless connection
Once the installation process finishes, you will get instructions on how to connect your printer, in some case you get the option to choose from Wired or Wireless connection. Click on the desired option and then follow instructions.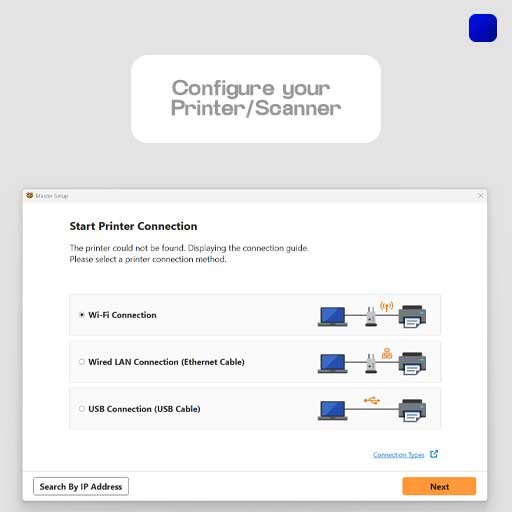
Finish Installation and Test Print
Once the installation is complete, the installer will notify you. At this point, you can choose to print a test page to ensure that the printer is functioning correctly or to exit installation. The installation process may also prompt you to register your printer or provide any additional configuration settings. It is recommended to Align your Printer before using.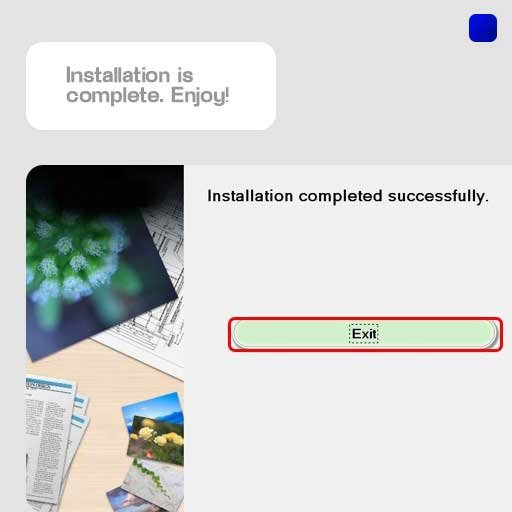
Manual Installation (If Auto-Install Fails)
If the auto installation of the driver fails.
- Right click on the main downloaded driver file, and extract the driver.
- Go to System “Settings”, Then Find the “Printers” Option, Select “Add Printers”.
- Next click on the “The printer I want isn’t listed”.
- Now choose “Add Manually” Option and Select Port, then click “Have Disk”.
- Now choose the file with “.inf” extension at the end from the extracted folder.
This method is subjected to the operating system and depends on the type of installer you have. You can no extract .msi files.
Video Guide:
Here is a video guide on how you can setup and install Canon Printer Drivers with ij.start.canon or ij.start.cannon, and install INK and other necessary steps.
Troubleshoot your Printer
Encountering issues with your Canon printer driver can disrupt your printing tasks. Fortunately, there are common troubleshooting steps to resolve these problems and get your printer back to working smoothly.
- Check Compatibility
- Ensure that the printer driver is compatible with your operating system. Verify that you have downloaded the correct driver version from the official Canon website.
- Restart the Printer and Computer
- In some cases, a simple restart can fix driver-related issues thus restarting both the printer and your computer may fix the issue.
- Update the Driver
- Outdated drivers may cause problems. Visit the Canon website and check for the latest driver updates for your printer model. Download and install the updated driver.
- Run Printer Troubleshooter
- Many operating systems have built-in printer troubleshooters. Use them to identify and automatically fix common driver-related issues.
- Reinstall the Driver
- If updating the driver didn’t help, consider reinstalling it by simply running the driver installer file again and choosing to reinstall it.
- Check Connectivity
- Ensure that the printer is properly connected to your computer, either through a USB cable or over a network. A loose connection can lead to driver problems.
- Disable Security Software
- Temporarily disable any security software (antivirus, firewall) that might interfere with the printer driver installation.
- Clear Print Queue
- If print jobs are stuck in the queue, it might cause driver issues therefore you need to Clear the print queue and try printing again.
- Verify Printer Settings
- Double-check printer settings such as paper size, print quality, and paper type to ensure they match your print job requirements.
- Test with Another Computer
- If possible, test the printer with a different computer. This can help determine if the issue is related to the printer or the specific computer.
- Error Codes
- There are many error codes like E02 for Paper Jam or paper not loaded, E03 for Paper jam inside the printer, E04 Ink cartridge not recognized, E05 for Cartridge installed incorrectly or unsupported. These are the most common ones and can be fixed by removing, loading paper, replacing Cartridges or swapping them and installing correctly.
- ij.start.canon showing wrong printer model
- After reassuring your Printer model, make sure that you do not have a VPN connected and you are in the right region version of the website, you can check that on the setup page on the top right section.
Copy or Duplicate using Canon Printers & Scanners
Effortless Duplications: Step-by-Step Copying with Canon Printers & Scanners
- Power on the Printer
- Ensure that your Canon printer is powered on and ready to use.
- Place the Document
- Open the printer’s scanner lid and position the document you want to copy face-down on the scanner glass. Make sure it is aligned according to any alignment guides or markers.
- Select Copy Function
- On the printer’s control panel, locate the “Copy” or “Copy/Scan” button. Press it to access the copy function. Some printers may have a dedicated copy button, while others may require you to navigate through the menu options to find the copy function.
- Set Copy Options
- Once in the copy mode, you may have the option to adjust settings such as the number of copies, paper size, copy quality, and color mode. Use the printer’s control panel or LCD display to make the desired adjustments. Refer to the printer’s user manual for specific instructions on navigating the copy settings.
- Start the Copy Process
- After setting the copy options, press the “Start” or “Copy” button on the printer’s control panel to initiate the copying process. The printer will scan the document and produce a copy based on your selected settings.
- Retrieve the Copies
- Once the copying process is complete, the printer will eject the copied documents into the output tray. Carefully collect the copies and ensure they are free from any smudges or imperfections.
Access ij.start.canon Drivers and Software’s Official Links for All Devices
Read our Guides and Manuals Exclusively designed for your Canon Printer with Official Links to drivers that help you connect with your Printer Easily.
Canon Printers and Scanner Guides are available for all compatible devices such as Windows, Mac, iOS, Android, Chrome OS, Google Cloud Print, and Linux Distributions.
Connect and Use your Printer/Scanner with Plug-n-Play
Most New Printer or scanner models from Canon come as Plug-n-Play, meaning that there is no need to install drivers or any software to use these printers or scanners, all you need to do is Power On your Printer, and connect it to your device with Wi-Fi or USB Cable, and you will get a prompt that automatically connects the printer and runs it on your device.
Apps Available for Mac and Windows
The Canon Print App is available on the Windows App Store and Mac OS App Store.
Search Canon Print and Install it right away. It makes the process of setting up the printer and scanner much easier and faster.
Tips & Tricks
Here are some Tips and Tricks that might come in handy for quick printing.
- Use CTRL (Control) + P key to print anything you want on Windows, and Command (⌘) + P on Mac.
- In Microsoft Office use Ctrl + F2 for Print Previews.
- Cmd + Option + P (macOS) for advanced printing Options.
- Use Pre-Built Margins for better printing Guides.
The importance of learning about online scams
In an age where cyber scams and tech support fraud are on the rise, protecting your devices and personal information has never been more important. We priorities safeguarding our premium subscribers from the growing threat of tech support fraud. We are not Canon INC nor affiliated with them, We are here to provide action against Tech Support Scams & Phishing.
Independent Exclusive Content
ij.start-canon.com is a third party Guides and Manuals provider that provides link to Official Canon Sources.
We provide exclusive details and in-dept guides for Canon Printers and help you with troubleshooting and guiding you to the right link to download the Printer Driver for your Supported Operating System.
Access Guides updated for 2026 in your Language
You can now access our guides & manuals in 100+ Languages with updated guides for 2026 and new ways to setup and install your Printers and Scanners.
Frequently Asked Questions
What is the Official Canon website?
The Official Canon website is https://ij.start.canon, the domain that ends with .canon is the official site. All the other websites including ours, are 3rd Party websites for providing better content and Insights on ij.start.canon, there are many other URLs from canon that do the same job, here are some: ij.start.cannon, ij.start.canon/connect, canon.com/ijsetup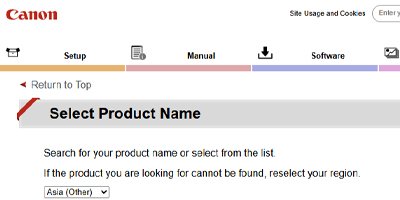
Are Canon Printers Plug-n-Play?
Yes, With the latest operating systems paired with Latest Canon Printers or Devices, It is all Plug-n-Play in most cases like AirPrint for Mac, Wireless Printing for Windows, USB Connection Printing.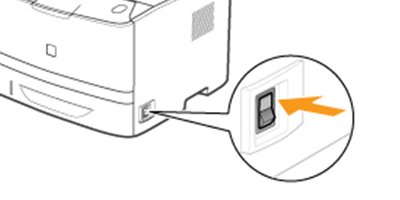
What is ij.start.canon?
ij.start.canon or ij.start.cannon is a website by Canon INC that simply allows you to find Guides, Step-by-Step Instructions, and Drivers related to the printer or scanner you are trying to connect. It is a portal that allows you to setup your Printer or Scanner from the Canon Printing and Scanning Product range. It has Geo Location based models and manuals for easy setup and installation. It is exclusive for Canon Printers and Scanner Models.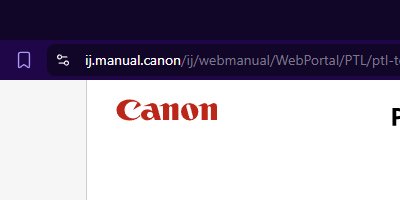
Are you Official Canon?
No, We are not official Canon, We are a third party, premium guides, manuals, and fraud mitigation service. Apart from providing Exclusive Guides, Manuals, Direct links to Canon Drivers in all the languages making it easy for users to connect to the Devices, We also specialize in reporting Tech Support frauds, remote support scams, and preventing phishing sites from going online.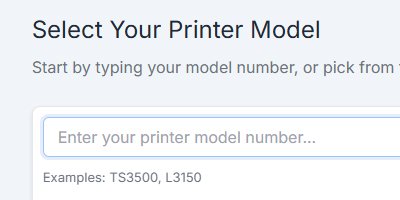
Is ij.start.canon safe to use?
Yes, the official website https://ij.start.canon is safe to use and does not have any malwares reported. The website does not require your personal information for Printer Driver support. So it is definitely safe and a very trustworthy website.
However, there are many fake websites with the same UI pretending to be Canon that are not safe to use and are directly related to Scams and Frauds, provide remote Tech Support.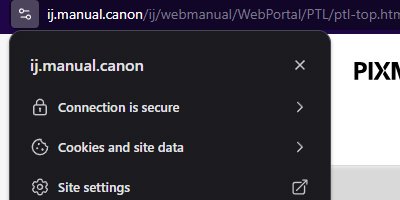
Do I need an account to use ij.start.canon?
No, You do not need an Account to use ij.start.canon, It is not limited by registrations or subscriptions. However you can still register your Product with canon on Canon Support website.
Is ij.start.canon Official Canon support?
ij.start.canon is not a Official Canon Support website, It is a driver download and a site that shows all the manuals and documents related to Canon Printers and Scanners. The support website for Canon Products is global.canon/en/support/
where you will be able to find all the products related support information.